Signature Option 1
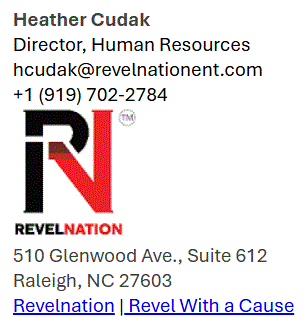
Signature Option 2
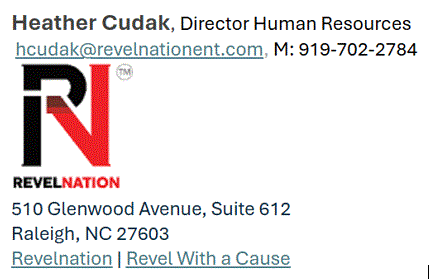
Signature Option 3

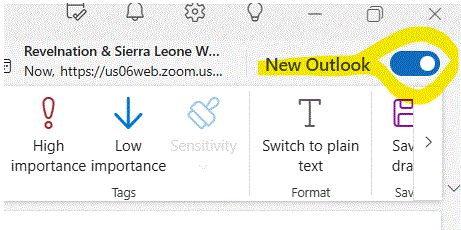
1) You must be in the New Outlook, top right corner.
2) Open a new email.
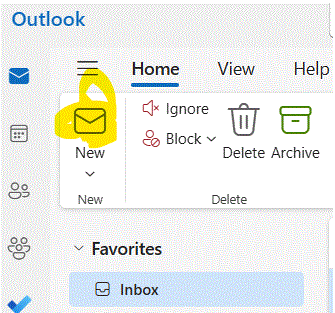
3) Find the dropdown arrow for Signatures. You may have to change the ribbon Settings from “Simplified” to “Classic” for it to be obvious.
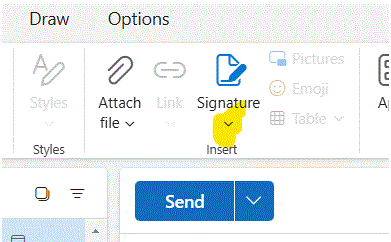
4) Choose “Signatures”.
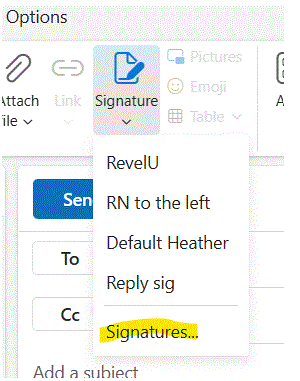
5) Click “+ New Signature”.
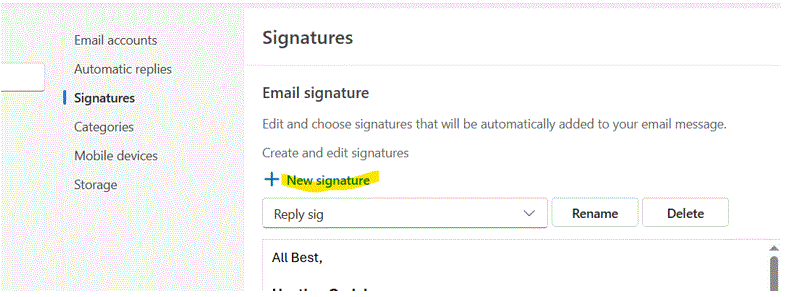
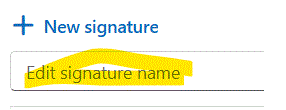
6) Name the Signature you’re creating, ie “Default”, “Reply”, “RevelU”.
7) Type Information and add a branding image.
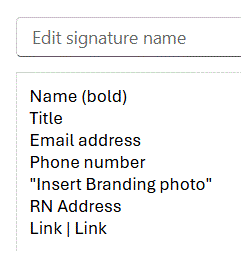
8) Insert hyperlinks. Type the word(s) you want to show (Revelnation and Revel With a Cause are what I used), highlight the word(s), then click on the elipses:
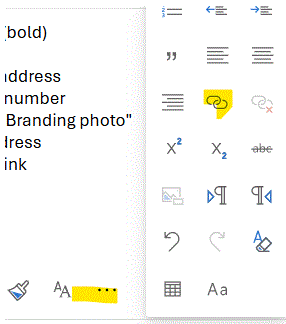
9) Click the hyperlink symbol (highlighted above) and this box will appear:
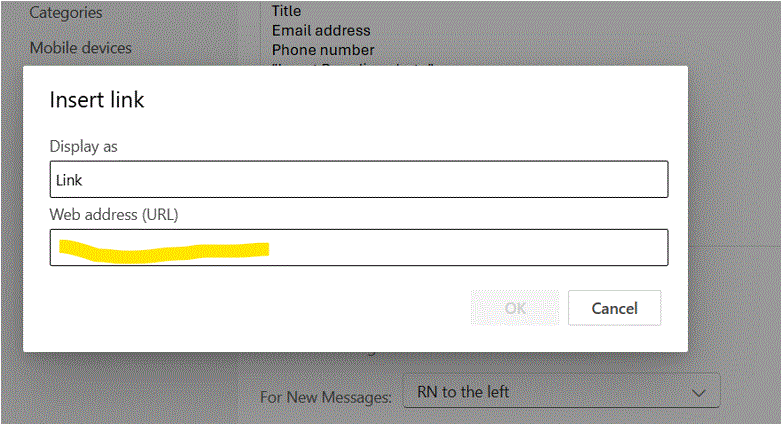
10) Type the address you want to point to and click “OK”.
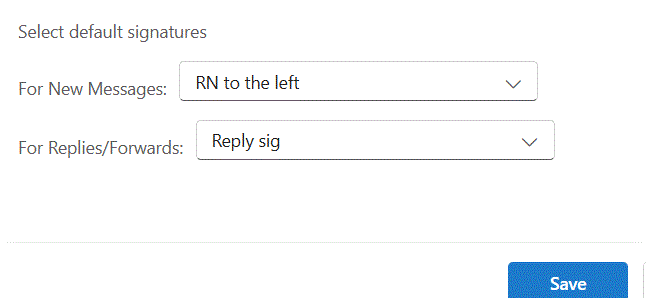
11) Select Desired default signatures, then Save.
1) You must be in the new Outlook, top right corner.

2) Open a new email.

3) Find the dropdown arrow for Signatures. You may have to change the ribbon Settings from “Simplified” to “Classic” for it to be obvious.

4) Choose “Signatures”.

5) Click “+ New Signature”.

6) Name the Signature you’re creating, ie “Default”, “Reply”, “RevelU”

7) Type Information and add a branding image.
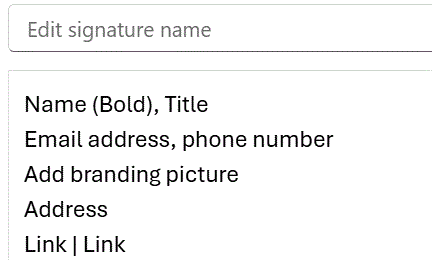
8) Insert hyperlinks. Type the word(s) you want to show (Revelnation and Revel With a Cause are what I used), highlight the word(s), then click on the elipses:

9) Click the hyperlink symbol (highlighted above) and this box will appear:

10) Type the address you want to point to and click “OK”.
11) Select Desired default signatures, then Save.

1) You must be in the new Outlook, top right corner.

2) Open a new email.

3) Find the dropdown arrow for Signatures. You may have to change the ribbon Settings from “Simplified” to “Classic” for it to be obvious.

4) Choose “Signatures”.

5) Click “+ New Signature”.

6) Name the Signature you’re creating, ie “Default”, “Reply”, “RevelU”

7) Open the ellipses and choose a table.
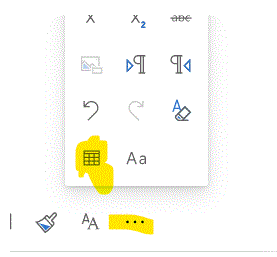
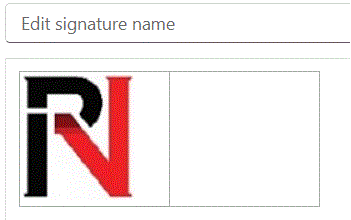
8) An Insert Table box appears. Choose one row and two columns.
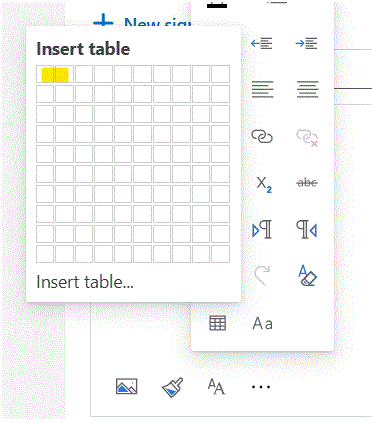
9) This appears:
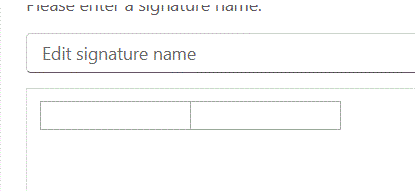
10) In Column 1, paste the current branding picture.
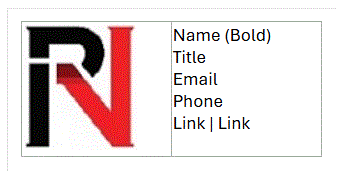
11) In Column 2, you may consider changing the font size from 12 to 11. Add your information and size your boxes appropriately for length and depth.
12) Insert hyperlinks. Type the word(s) you want to show (Revelnation and Revel With a Cause are what I used), highlight the word(s), then click on the elipses:

13) Click the hyperlink symbol (highlighted above) and this box will appear:

14) Select desire Default Signatures, then Save.

Signature 1 Instructions
1) You must be in the new Outlook.

2) Open a new email.

3) Find the dropdown arrow for Signatures. You may have to change the ribbon Settings from “Simplified” to “Classic” for it to be obvious.

4) Choose “Signatures”.

5) Click “+ New signature”.

6) Name the Signature you’re creating, ie “Default”, “Reply”, “RevelU”.

7) Type Information and add a branding image.

8) Insert hyperlinks. Type the word(s) you want to show (Revelnation and Revel With a Cause are what I used), highlight the word(s), then click on the elipses:

9) Click the hyperlink symbol (highlighted in previous image) and this box will appear:

10) Type the address you want to point to and click “OK”.
Lorem ipsum dolor sit amet, consectetur adipiscing elit. Ut elit tellus, luctus nec ullamcorper mattis, pulvinar dapibus leo.
11) Select Desired default signatures, then Save.

Or below in gray is without the images embedded directly after the text. We could embed them at the bottom of the page. Ideas?
1) You must be in the new Outlook.
2) Open a new email.
3) Find the dropdown arrow for Signatures. You may have to change the ribbon Settings from “Simplified” to “Classic” for it to be obvious.
4) Choose “Signatures”.
5) Click “+ New Signature”.
6) Name the Signature you’re creating, ie “Default”, “Reply”, “RevelU”.
7) Type Information and add a branding image.
8) Insert hyperlinks. Type the word(s) you want to show (Revelnation and Revel With a Cause are what I used), highlight the word(s), then click on the elipses:
9) Click the hyperlink symbol (highlighted above) and this box will appear:
10) Type the address you want to point to and click “OK”.
11) Select Desired default signatures, then Save.

